

You do not need a fully equipped gym to get a good workout. A set of resistance bands can be enough to challenge your muscles, improve strength, and add variety to your training without taking up much space.
That simplicity is part of what makes resistance bands so useful. They are inexpensive, lightweight, easy to store, and convenient enough to take almost anywhere. You can use them at home, pack them in a suitcase when you travel, or keep a set in your gym bag for exercises that are difficult to replicate with free weights.
But having a resistance band and knowing how to use it are two different things.
The band needs to be positioned correctly, the resistance needs to match the exercise, and every repetition should be performed under control. If the band is too light, the exercise may not provide enough of a challenge. If it is too heavy, you may lose your posture or compensate with other muscles to complete the movement.
Learning how to use resistance bands correctly is therefore less about finding the hardest band you can handle and more about understanding how to create useful tension while maintaining good technique.
Resistance bands can be used to train almost the entire body. Depending on how you position the band, you can work your legs, glutes, arms, shoulders, back, chest, and core. You can also use them for warm-ups, mobility work, strength exercises, and assisted movements such as pull-ups.
This guide explains what resistance bands are, how they work, how to choose the right level of resistance, and how to use them effectively for different muscle groups. It also includes a simple beginner resistance band workout and important safety tips to help you train with confidence.
What Are Resistance Bands?
Resistance bands are elastic bands that provide resistance as you stretch them. Unlike a dumbbell, which provides fixed amount of external load, a resistance band becomes more challenging as it is stretched farther.
This creates a different type of resistance compared with traditional free weights.
A resistance band can be used on its own, wrapped around part of your body, or attached to a secure anchor point. Some bands are short loops designed for exercises such as squats and lateral walks, while longer bands with handles or attachment points can be used for rows, presses, curls, and other movements.
Resistance bands also come in different levels of resistance. A lighter band is generally easier to stretch, while a heavier band requires more force.
However, the label on a band does not tell you exactly how difficult an exercise will feel. The amount of resistance depends on how far the band is stretched, where it is positioned, and how you perform the movement.
For example, the same band may feel relatively easy during a short-range exercise but significantly harder when stretched farther.
That is why learning how the band behaves during each exercise is more useful than relying solely on a resistance label.
Why Use Resistance Bands?
Resistance bands offer several advantages, particularly for beginners and people who want a flexible training option.
One of their biggest advantages is convenience. A few bands can provide enough resistance for a surprisingly large number of exercises, and they take up very little room. This makes them particularly practical for home workouts where you may not have space for a full set of dumbbells or large exercise machines.
They are also useful for people who travel frequently. A resistance band can fit into a suitcase or backpack, allowing you to maintain some form of strength training even when you do not have access to a gym.
Another benefit is versatility. A band can be used to train individual muscles or incorporated into full-body movements. You can perform squats for your lower body, curls for your arms, rows for your back, presses for your chest, and rotational exercises for your core using the same basic equipment.
Resistance bands can also provide a useful alternative when traditional weights are uncomfortable or unavailable. Because the resistance changes as the band stretches, the movement can feel different from lifting a fixed weight.
For beginners, bands can also provide an approachable way to learn basic movement patterns before progressing to heavier equipment.
The key is understanding that resistance bands are not simply a substitute for dumbbells. They are their own training tool, with their own resistance profile and technique considerations.
How to Choose the Right Resistance Band
Choosing a resistance band can seem confusing when you see several colors, sizes, and resistance levels.
The simplest approach is to choose a band that allows you to perform the exercise with good technique while still making the final repetitions challenging.
A band that is too light may not create enough resistance to challenge your muscles. You may be able to complete dozens of repetitions without feeling that the exercise is becoming difficult.
A band that is too heavy creates the opposite problem. You may struggle to maintain your posture, shorten the movement, or use momentum to overcome the resistance.
For beginners, starting with lighter resistance is usually the better choice. It gives you an opportunity to learn the movement and understand how the band behaves before increasing the challenge.
You do not necessarily need one band that works for every exercise. Your legs can generally handle more resistance than smaller muscle groups such as your shoulders or arms, so you may eventually want multiple bands with different resistance levels.
Think of your bands as a collection of tools rather than a single piece of equipment.
How to Use Resistance Bands for Your Legs
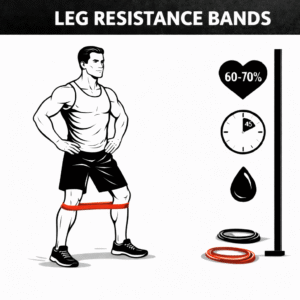
Resistance bands are particularly effective for lower-body exercises because the legs and hips can handle a significant amount of resistance.
Depending on the exercise, you can position a loop band around your thighs, above your knees, around your ankles, or under your feet.
The important thing is to make sure the band is secure before beginning the movement.
Resistance Band Squats
A resistance band can add another challenge to the traditional squat.
Depending on the type of band you are using, you can stand on a long band and hold the ends near your shoulders, or place a loop band around your thighs.
When using a loop around the thighs, the band encourages you to maintain control of your knees and hips as you squat.
Begin with your feet in a comfortable stance and maintain stable contact with the floor. Lower yourself by bending your hips and knees while keeping your torso controlled. Return to standing by driving through your feet and extending your hips and knees.
The band should create tension without forcing your knees into an unnatural position.
If the band is causing you to lose your squat technique, reduce the resistance.
Lateral Band Walks
Lateral band walks are commonly used to strengthen the muscles around the hips and improve lower-body stability.
Place a loop band around your thighs or ankles, depending on the level of difficulty and the equipment available.
Bend your knees slightly and maintain an athletic stance. Take controlled steps sideways while keeping tension in the band.
Avoid letting your feet come completely together between steps because doing so removes much of the band’s tension.
Move slowly and deliberately rather than taking large, rushed steps.
This exercise can work well as part of a warm-up or as an accessory movement during a lower-body workout.
Glute Kickbacks
Glute kickbacks use the resistance band to challenge hip extension.
Secure the band appropriately around your ankles or to a stable anchor, depending on the type of band. From a controlled position, move one leg backward while keeping your torso stable.
The goal is not to swing your leg as far backward as possible.
Use a range of motion that allows you to keep your pelvis and torso controlled. Return the leg slowly instead of allowing the band to snap it back toward the starting position.
This makes the exercise more effective and keeps tension on the working muscles.
How to Use Resistance Bands for Your Arms
Resistance bands can provide effective resistance for common arm exercises without requiring dumbbells.
They are especially useful for home workouts because you can perform several upper-body exercises with very little equipment.
Resistance Band Bicep Curls
Stand on the middle of a resistance band and hold the ends in your hands.
Keep your elbows close to your sides as you bend your arms and curl the handles or ends upward.
Avoid leaning backward to help the weight move. Your torso should remain stable while your biceps perform most of the work.
Lower your hands slowly and maintain tension in the band throughout the movement.
Because the resistance changes as the band stretches, the top portion of the curl may feel considerably harder than the starting position.
Resistance Band Tricep Extensions
Tricep extensions can be performed with the band anchored above your head.
Hold the band with your elbows bent and positioned near your sides. Extend your arms downward while keeping your upper arms relatively stable.
Focus on moving through the elbow rather than allowing your shoulders to take over the movement.
Return slowly to the starting position.
If you are using a door anchor, make sure the anchor and door are secure before beginning. Never assume a loose or poorly positioned anchor will safely handle resistance.
Resistance Band Lateral Raises
Lateral raises target the muscles around the shoulders.
Stand on the band and hold the opposite ends or handles. With your arms slightly bent, raise them outward until they approach shoulder height.
Do not feel that you need to raise your arms significantly above your shoulders. The goal is controlled movement rather than maximum height.
Use a lighter band if you find yourself swinging your arms or shrugging your shoulders to complete the repetitions.
How to Use Resistance Bands for Your Back and Chest
Resistance bands can also provide effective horizontal pulling and pushing movements for the upper body.
These exercises can be particularly useful when you are training at home and do not have access to cable machines.
Resistance Band Rows
Rows are one of the most useful resistance band exercises for the back.
You can anchor the band at an appropriate point or loop it around a secure object depending on the equipment you have.
Start with your arms extended and pull the band toward your torso while drawing your shoulder blades back in a controlled manner.
Avoid shrugging your shoulders toward your ears.
Pause briefly when your hands reach the appropriate position, then slowly extend your arms again.
The band should remain under tension throughout the movement.
Resistance Band Chest Press
A resistance band chest press can replicate some of the movement pattern of a traditional chest press.
Secure the band behind you using a safe and stable setup, then hold the handles or ends at approximately chest height.
Press your hands forward while keeping your torso stable.
Do not allow the band to pull your arms backward uncontrollably during the return.
The anchor point must be secure because the band stores elastic tension. A poorly secured band can move suddenly and cause injury.
Band Pull-Aparts
Band pull-aparts are simple but useful for training the upper back and shoulder stabilizers.
Hold the band in front of your chest with both hands. Keeping your arms relatively straight, pull your hands apart until the band approaches your chest.
Focus on controlling the movement and keeping your shoulders relaxed.
Slowly return to the starting position.
Because this exercise typically uses relatively light resistance, it can also work well during a warm-up.
How to Use Resistance Bands for Your Core
Resistance bands can add resistance to core exercises while also challenging your ability to stabilize your torso.
Standing Band Rotations
Attach the band to a secure anchor point around torso height.
Stand perpendicular to the anchor while holding the band with both hands. Extend your arms in front of your body and rotate your torso away from the anchor.
The movement should be controlled. Avoid simply swinging your arms.
Your core should resist the pull of the band while allowing your torso to rotate through a controlled range.
Repeat on both sides to train the movement evenly.
Kneeling Band Crunches
Anchor the band above you and kneel while holding the handles or band ends.
From the starting position, contract your abdominal muscles and bring your upper body downward against the resistance.
Avoid pulling the band primarily with your arms.
The movement should come from your trunk while your hips remain relatively stable.
Plank Band Pulls
A resistance band can make a standard plank more challenging by introducing an additional pulling force.
Set up in a stable plank position and use the band in a way that requires you to resist rotation while maintaining your alignment.
This is more demanding than a standard plank, so it is best suited to people who already have good control of the basic movement.
How to Use Resistance Bands at Home
One of the biggest reasons people choose resistance bands is that they work exceptionally well for home training.
You do not need a large room or a collection of heavy equipment. A small space and a few bands can be enough for a complete workout.
However, home training requires extra attention to setup.
If you are anchoring a band to a door, piece of furniture, or another fixed point, make sure the anchor is designed or positioned to handle the resistance. Avoid attaching bands to unstable furniture or objects that could move unexpectedly.
If you are using a door anchor, check that the door is securely closed and that the anchor is positioned correctly before applying significant tension.
For a basic home workout, you can combine lower-body, upper-body, and core exercises into one session. Rather than performing every exercise available, select a small number of movements that cover the major areas of the body.
A 20 to 30-minute workout can be enough when the exercises are performed with appropriate resistance and controlled technique.
Beginner Resistance Band Workout
If you are completely new to resistance band training, keep your first workouts simple.
A practical beginner session can include:
Band Squats: 3 sets of 10 to 12 repetitions
Band Bicep Curls: 3 sets of 10 to 12 repetitions
Band Rows: 3 sets of 10 to 12 repetitions
Lateral Band Walks: 2 sets of 10 to 15 controlled steps per side
Standing Band Rotations: 2 to 3 sets of 10 repetitions per side
Rest long enough between sets to recover your breathing and maintain good technique.
You do not need to train to complete exhaustion.
The purpose of your first few weeks is to learn how the resistance feels and develop control.
As the exercises become easier, you can gradually increase resistance, repetitions, sets, or the difficulty of the movement.
How to Use Resistance Bands for Pull-Ups
Resistance bands can also be used to assist with pull-ups.
This can be particularly helpful if you are not yet strong enough to perform a full bodyweight pull-up.
A long resistance band can be secured around the pull-up bar and positioned under your feet or knees. The band provides assistance as you pull yourself upward.
The amount of assistance depends on the band’s resistance and how it is positioned.
Heavier bands generally provide more assistance, making the movement easier. As your pulling strength improves, you can gradually reduce the amount of assistance by using a lighter band.
When using a resistance band for pull-ups, make sure the band is properly secured before starting. Check for signs of wear and avoid using damaged bands.
The goal is to use enough assistance to perform controlled repetitions while gradually building the strength required for an unassisted pull-up.
How to Progress With Resistance Bands
Progressive overload is just as important with resistance bands as it is with traditional weights.
If you always use the same band for the same number of repetitions, your body will eventually adapt to the challenge.
Progression can take several forms.
You might move from a lighter band to a heavier one. You could increase the number of controlled repetitions you perform. You could add another set to an exercise or increase the range of motion.
Another option is to slow down the movement.
For example, instead of completing a resistance band curl quickly, take two or three seconds to lower your hands. This increases the amount of time your muscles remain under tension.
You can also make an exercise more challenging by changing your position and increasing the amount the band is stretched.
The important thing is to make changes gradually.
You do not need to increase every variable at once.
Resistance Band Safety Tips
Resistance bands are simple pieces of equipment, but they still need to be used carefully.
Inspect your bands regularly for cracks, tears, thinning, or other visible damage. Elastic material can deteriorate over time, especially if the band is exposed to heat, sunlight, sharp edges, or excessive friction.
If a band shows significant damage, replace it rather than continuing to use it.
Control every repetition. Do not allow the band to snap back suddenly after you reach the end of a movement.
Pay attention to your posture, particularly during standing exercises. Keep your torso stable and avoid using momentum to overcome resistance.
Start with lighter resistance while learning an exercise. You can always increase the challenge later.
Anchoring deserves special attention. Only use secure anchor points that can safely handle the tension created by the band. Never attach a band to an object simply because it appears heavy enough.
Finally, stop an exercise if you experience sharp or unusual pain. Normal muscular fatigue is different from pain that may indicate an injury.
Common Resistance Band Mistakes
One of the most common mistakes is choosing too much resistance.
People often assume that a stronger band will automatically produce better results. In reality, excessive resistance can make it impossible to perform the exercise correctly.
Another common mistake is allowing the band to go completely slack during a repetition when the exercise is intended to maintain continuous tension.
Form can also deteriorate when people rush. Because bands are lightweight and easy to move, it can be tempting to perform repetitions quickly.
Slow down.
Controlled repetitions make it easier to maintain the intended movement pattern and understand where the resistance is coming from.
Finally, do not treat resistance band workouts as something that only beginners should do. Bands can remain useful as your fitness level improves. They can supplement traditional strength training, provide variety, and make it easier to train when you do not have access to a gym.
Final Thoughts
Resistance bands may look simple, but they can provide a surprisingly effective way to train your entire body.
The biggest advantage is not that they are a replacement for every piece of gym equipment. It is that they make resistance training more accessible. You can use them in a bedroom, living room, hotel room, gym, or outdoor space with very little setup.
The key is learning how to use resistance bands correctly.
Start with a resistance level you can control. Pay attention to your posture and movement. Keep tension under control rather than allowing the band to snap back. Make sure every anchor point is secure, and inspect your equipment regularly.
As you become stronger, gradually increase the challenge. Move to a stronger band, perform additional repetitions, increase your range of motion, or slow down your tempo. Small changes can keep your workouts challenging without making them unnecessarily complicated.
You also do not need to build your entire fitness routine around resistance bands. They can work alongside dumbbells, barbells, machines, bodyweight exercises, and cardiovascular training. Their portability makes them particularly valuable on days when getting to the gym is difficult.
Whether your goal is to build strength, improve general fitness, train at home, or simply have a convenient workout option when you travel, resistance bands give you plenty of possibilities.
The equipment itself is only part of the equation. Your consistency, technique, and willingness to gradually challenge yourself are what ultimately determine your results.
Start with the basics, learn how your bands respond to different movements, and build from there. With regular practice and good form, a small set of resistance bands can become one of the most useful pieces of equipment in your fitness routine.
Last Updated on September 3, 2026
Written By

Join thousands of readers leveling up their fitness.
Skip the guesswork—get insights on training, health, and the right gear to support your progress.
You may also like
6 Best Quad Exercises For Strength & Mass
Well-developed quadriceps are the foundation of a strong lower body. Whether…

11 Best Gym Slides in the Philippines
Discover the best gym slides available in the Philippines—ideal for gym…
11 Best Chest Strap Heart Rate Monitors in the Philippines
Chest strap heart rate monitors offer unparalleled accuracy for fitness…

11 Best Knee Sleeves in the Philippines
Knee sleeves are essential for athletes and fitness enthusiasts seeking joint…
11 Best Lifting Straps in the Philippines
Discover the 11 best lifting straps available in the Philippines to boost your…
11 Best Weightlifting Belts in the Philippines
Looking for the best weightlifting belts in the Philippines? This guide…